Quick install
Please check the requirements before you start installing the uMarketingSuite.
Installation via NuGet
Install uMarketingSuite via Nuget in your IDE such as Visual Studio, Jetbrains Rider, VSCode (With C# DevKit) or alternatively even the terminal. Below we show how to install uMarketingSuite via Visual Studio.
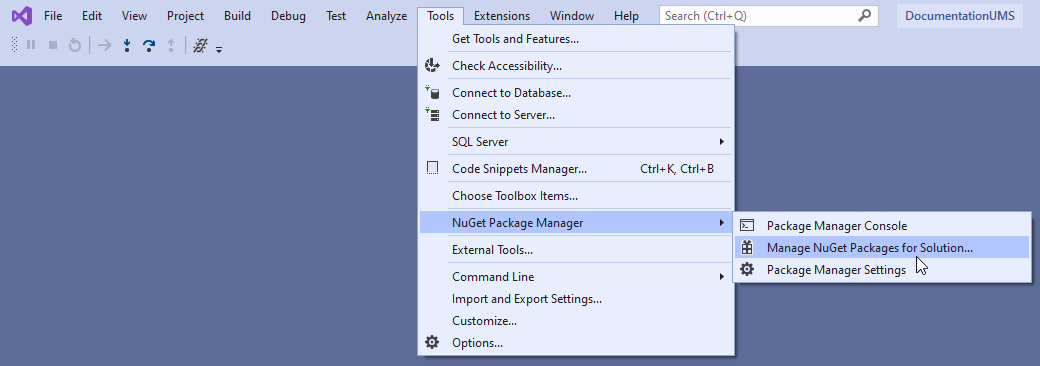
- To install the uMarketingSuite via NuGet go to the NuGet package manager in Visual Studio
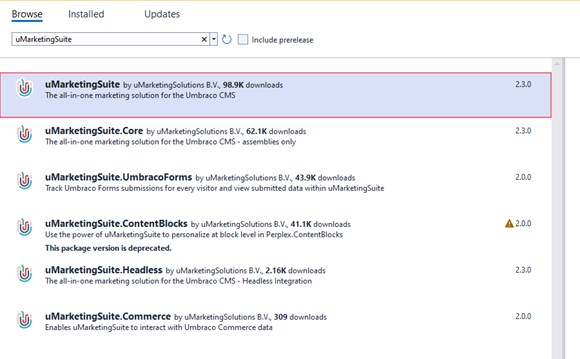
- Search for the uMarketingSuite, select the package and install it in your project
Installing using the terminal
Alternatively you can install uMarketingSuite using the package manager console inside Visual Studio, type
PM> install-package uMarketingSuite
Or if you are using modern Umbraco 9+ that runs on .NET you can open a terminal window and install the Nuget package with the following command, making sure you have navigated to the folder containing the Umbraco website you wish to install uMarketingSuite into.
dotnet add package uMarketingSuite
It really is simple as that 🎉
If you have any trouble, please go to Troubleshooting installs.
Next steps...

If you've installed the uMarketingSuite you can build or restart your website and automatically the Marketing section will appear in the backoffice, as shown above.
The next step is to configure a license and you're ready to go, but to get the best out of uMarkerktingSuite make sure to follow these additional steps.
Umbraco Forms
If you've installed Umbraco Forms as well and want to automatically track submissions of Umbraco Forms. Please install the package uMarketingSuite.UmbracoForms via NuGet as well using your preferred approach as above.
PM> install package uMarketingSuite.UmbracoForms
For modern Umbraco 9+ use
dotnet add package uMarketingSuite.UmbracoForms
Clientside tracking
To capture events that happen on the clientside (frontend) of your website, you will need to add the clientside tracking script by including this snippet on all of your pages.
<script src="/Assets/uMarketingSuite/Scripts/uMarketingSuite.analytics.js"></script>
Cockpit
Cockpit is a tool to help with testing segments and diagnose the data uMarkertingSuite is collecting and can be viewed on the frontend of your website, only if you are logged into Umbraco as well.
Install cockpit on your website by adding the following Razor Partial View in your templates in Umbraco just before the closing </body> tag
Learn more what Cockpit is and how you can use it.
@Html.Partial("uMarketingSuite/Cockpit")
</body>
Optional Extras
Here are some optional extras you can do to improve your experience with uMarketingSuite.
- Add a Google Analytics bridging script that automatically sends events that you send to Google Analytics, to uMarketingSuite as well.
<script src="~/Assets/uMarketingSuite/Scripts/uMarketingSuite.analytics.ga4-bridge.min.js"></script>
- Optionally, add the Google Analytics blocker detection script as well. This gives you insights in which page traffic the uMarketingSuite will track, and Google Analytics won't track!
<script src="/Assets/uMarketingSuite/Scripts/uMarketingSuite.analytics.blockerdetection.js"></script>
That's it! Now you're ready to start! 🚀
Some final notes:
Cookie consent
If you would like to influence the default uMarketingSuite cookie behaviour please go here. Or go to an example implementation using Cookiebot which can be used as an example for other cookie consent providers.
Important! If you change the default cookie behaviour always make sure to perform a client side reload of the initial page after cookie consent or else the visitor referrer and/or campaigns will not be tracked!
Loadbalancing and CM / CD environments
Using a loadbalanced setup and/or separate CM and CD environments? Please check our documentation about this topic here.