Campaign scoring
Campaigns are one of the ways to create a implicit scoring for personalization. By setting up campaigns correctly you can easily assign points to personas or customer journeys.
Setting up your campaigns
Campaigns are automatically scored by using utm-parameters, that you may be already using for your marketing campaigns. You can add 5 different parameters to your url:
- utm_source: Identify the advertiser, site, publication, etc. that is sending traffic to your property, for example: google, newsletter4, billboard.
- utm_medium: The advertising or marketing medium, for example: cpc, banner, email newsletter.
- utm_campaign: The individual campaign name, slogan, promo code, etc. for a product.
- utm_term: Identify paid search keywords. If you're manually tagging paid keyword campaigns, you should also use utm_term to specify the keyword.
- utm_content: Used to differentiate similar content, or links within the same ad. For example, if you have two call-to-action links within the same email message, you can use utm_content and set different values for each so you can tell which version is more effective.
Each parameter must be paired with a value that you assign. Each parameter-value pair then contains campaign-related information.
For example, if you want to link from a newsletter to the pricing-page of the umarketingsuite.com, you can use the following parameters:
- utm_source = newsletter-july-2021 to identify that this visitor came from this specific newsletter
- utm_medium = newsletter to show that the medium was a newsletter
- utm_campaign = more_signups because that newsletter was part of a bigger campaign
- utm_content = bottom_button to identify a specific link in the newsletter
If you want to use these parameters you'll need to setup the url as:
Scoring your campaigns
Now that you've created urls for campaigns they will automatically be tracked by the uMarketingSuite and you can score them for implicit personalization purposes.
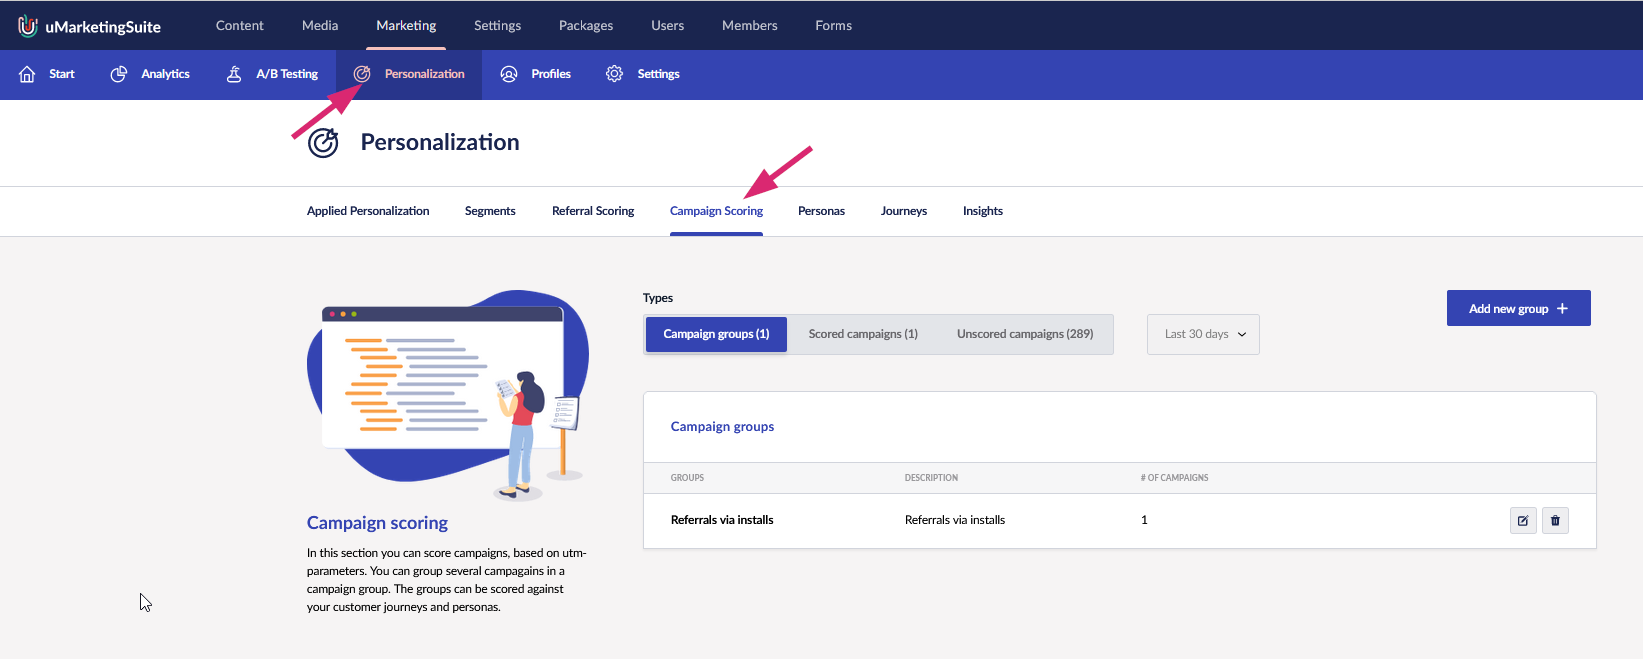
If you go to Personalization -> Campaign scoring you'll see all the campaign groups, all the campaigns that you've already scored, and the campaigns that need scoring.
Creating a campaign group
First you need to create one or more campaign groups. Campaign groups allows you to group campaigns together so you do not have to setup the persona and customer journey scoring for each individual campaign but only on a group level.
You can create a group for a set of personas for example and assign scores to the group. Next you can assign different campaigns to that group and every visitor that comes to the website via that campaign gets the points that are referred the campaign group.
You can add a new campaign group by clicking "Add new group". This will open up a popup where you can specify the name of the campaign group and a short description. After that you can specify specific points to this group:
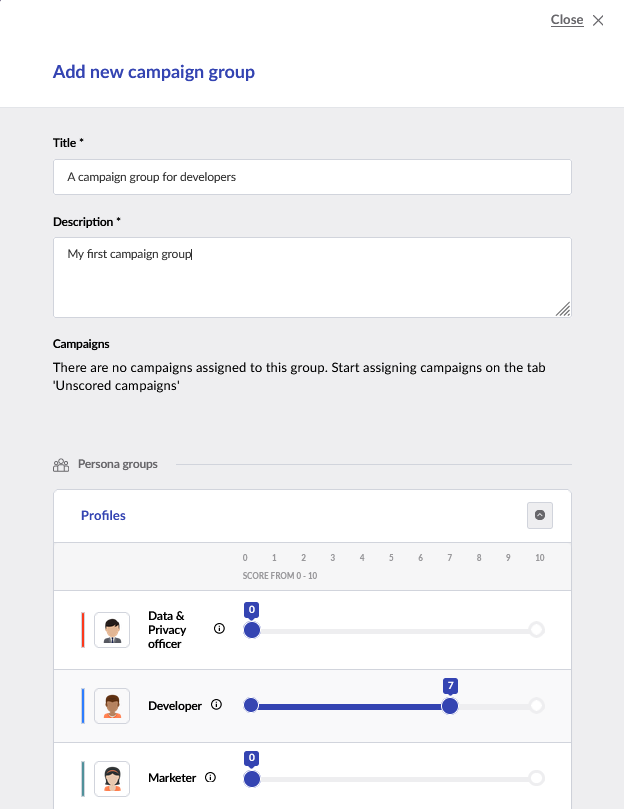
In this case I've created a campaign group "A campaign group for developers" and assigned 7 points to the developer persona. This means that as soon as somebody comes to the website via a url with utm-parameters that is part of this campaign group, the visitor will get 7 points for the developer persona.
Because we haven't assigned any campaigns yet, in this case the group will never be triggered.
Unscored campaigns
In the tab "Unscored campaigns" you find all campaigns that have not be assigned yet. Remember again that campaigns are created by adding utm-parameters to your url. As soon as the uMarketingSuite detects a new combination of utm-parameters it will add that combination to the list of Unscored Campaigns.
An example of this tab could look like this:
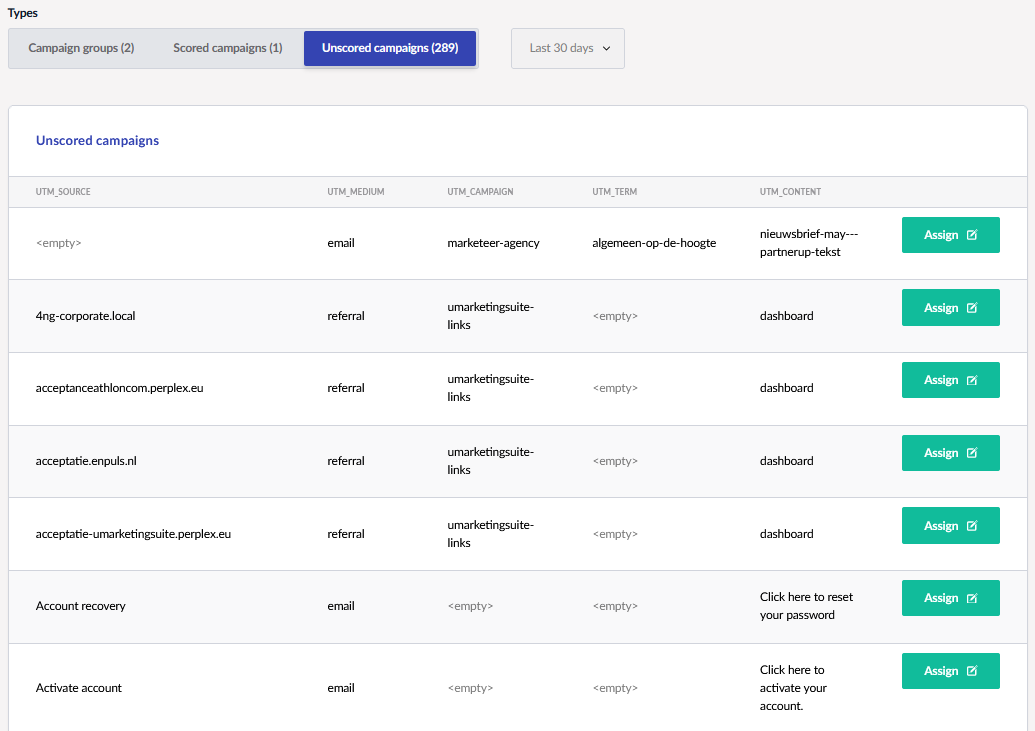
So here you see that in the last row for example the utm_source is "Activate account", the utm_medium is "email" and the utm_content is "click here to activate your account". The url that the visitor used to get to the website looked something like https://<url>?utm_source=activate account&utm_medium=email&utm_content=click here to activate your account.
Every unscored campaign can be assigned to campaign group by clicking on the "Assign" button. If you do that a popup will open that allows you to assign the specific campaign to one of your created campaign groups.
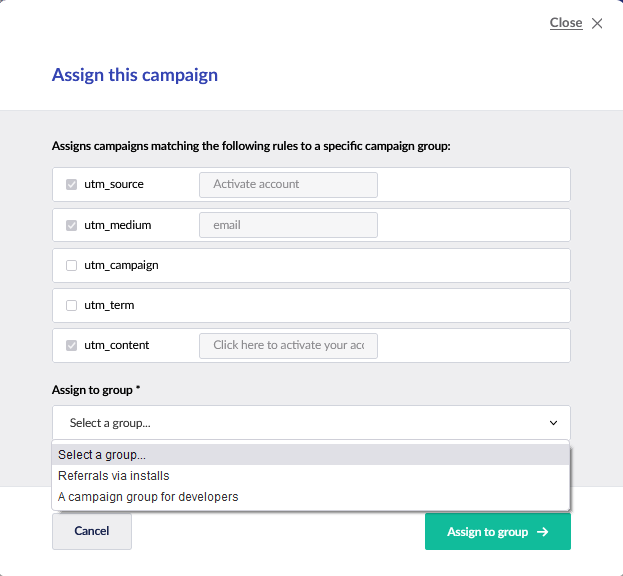
By assigning this example to the "A campaign group for developers" from now on every visitor that comes to the website with these utm-parameters setup will get the points assigned that are setup in the campaign group. In this example this would be 7 points for developers.
Scored campaigns
On this tab you will see all the campaigns that are linked already to a campaign group.
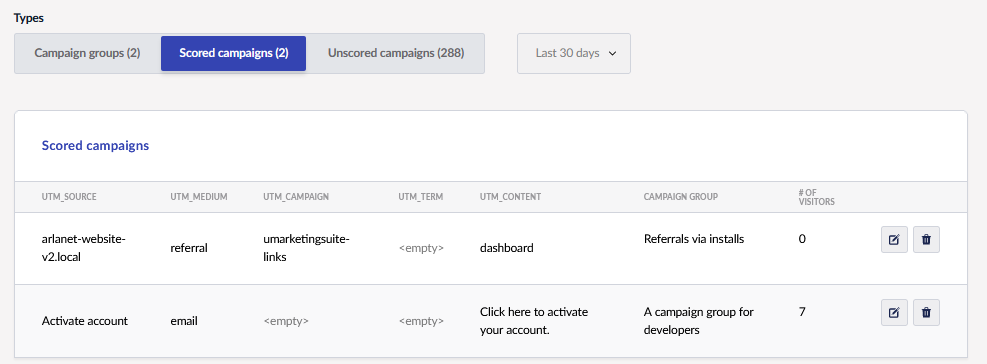
You can assign the campaign to a different campaign group or delete it from the existing campaign group. By deleting it, the campaign will go back to the the tab "Unscored campaigns".